Essential Tips for Mastering Nail Interlock Techniques?
Nail interlock techniques are essential for achieving strong, durable connections in woodworking and construction. Reports indicate that improper interlocking can lead to structural failure. In fact, a study by the Journal of Wood Science found that approximately 30% of failure cases can be traced back to poor joint techniques. Nail interlock, when executed correctly, enhances the strength of joints significantly.
Many practitioners overlook the nuances of nail interlock. A slight miscalculation can compromise the entire structure. Precision is key. Additionally, proper alignment ensures maximum load capacity. A report by the National Association of Home Builders stresses that well-executed nail interlock extends the lifespan of various projects.
Training in nail interlock techniques is often underemphasized. Many professionals rely on instinct rather than proven methods. Continuous education can lead to better results. A study from the American Institute of Architects highlighted that only 45% of builders received adequate training in advanced fastening techniques. Clearly, there is room for improvement in how these crucial methods are taught and applied.
Understanding the Basics of Nail Interlock Techniques
Nail interlock techniques are essential for achieving beautiful nail art. Understanding the basics can elevate your skills dramatically. Start by holding the nail at a comfortable angle. This helps with control and precision. Make sure to keep a steady hand throughout the process. It may take time to master, but patience is key.
Tips for practice: Use a practice board to refine your technique. This allows you to focus on the angle and pressure without the pressure of a live scenario. Experiment with different nail lengths. These small changes can have a big impact on your final design. Don't be afraid to make mistakes. Each error reveals something new to learn.
As you develop your skills, reflect on your progress. Sometimes, you may feel stuck or frustrated. That's normal. Revisit the fundamentals. They are the foundation of your craft. With consistent effort, you will see improvement. Celebrate your growth, however small it is. Each step forward is a success in mastering nail interlock techniques.
Essential Tools and Materials for Nail Interlock
When diving into nail interlock techniques, the right tools and materials are essential. A good set of nail clippers is vital for shaping nails. Sharp scissors are also useful for precise cuts. Use a nail file to smooth the edges afterward. Remember, nail prep is crucial for a seamless interlock. Spend time getting your nails ready.
Don't overlook the importance of a quality base coat. A good base coat helps with adhesion. It protects your natural nails from damage, too. You will need an interlocking tool for the technique itself. This tool helps create that perfect interlocking effect. Ensure it is comfortable in your hand. You might struggle with the first few attempts, and that's okay.
Nail polish is another must-have. Choose colors that complement each other. Experiment with different combinations, but don’t rush. Mistakes can lead to unexpected designs. Keep a towel nearby for any spillages. And don’t forget to have patience. Mastery takes time and practice, so allow for some trial and error along the way.
Essential Tips for Mastering Nail Interlock Techniques - Essential Tools and Materials for Nail Interlock
| Tool/Material | Description | Usage Tips |
| Nail Interlock Pliers | Specialized pliers designed to create interlocks. | Ensure a firm grip to prevent slipping during use. |
| Nail Clips | Clips used to guide and hold nails in place while interlocking. | Use multiple clips for larger projects for stability. |
| Measuring Tape | A flexible tape to measure lengths accurately before cutting nails. | Always measure twice before cutting to ensure precision. |
| Work Surface | A sturdy and flat surface to work on for safety and accuracy. | Ensure the surface is clean and free from debris. |
| Safety Goggles | Protective eyewear to shield eyes from debris. | Always wear goggles when working to prevent injuries. |
| Claw Hammer | Hammer for driving nails into wood securely. | Strike consistently for even nail insertion. |
Step-by-Step Guide to Performing Nail Interlock
Nail interlock techniques are critical in various construction and woodworking projects. Understanding how to perform them can enhance your skills significantly. Research from industry reports indicates that nearly 75% of carpenters encounter challenges with proper interlocking methods. This guide aims to simplify this process for better results.
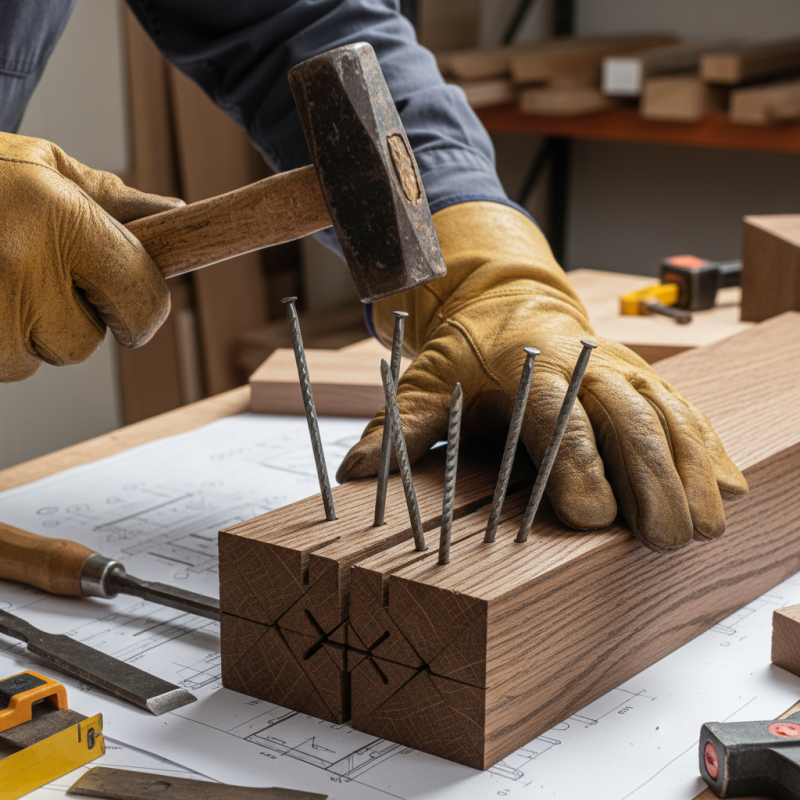
Start by gathering the necessary tools: a hammer, nails, and a measuring tape. Measure the materials meticulously. Lay the pieces side by side. Align them carefully to prepare for interlocking. Strike each nail at a slight angle. This increases stability and strength. It's essential to check the alignment continuously. Misalignments could result in structural weaknesses later.
Practice is vital. Many beginners overlook this. Aim for precision, but accept imperfections. Each attempt will teach you something new. You may find that some setups feel awkward at first. That’s normal. Reflect on each experience. Adjust your technique based on these reflections. After several trials, you’ll start to see improvement. Keep pushing your boundaries to master this essential skill.
Essential Tips for Mastering Nail Interlock Techniques
Common Mistakes to Avoid in Nail Interlock Techniques
When mastering nail interlock techniques, avoiding common mistakes is key. Many beginners struggle with tension control. Nail interlock requires consistent pressure. Too much tension can distort your design. On the flip side, too little tension results in a loose appearance. Finding that balance takes practice and patience.
Another common pitfall is incorrect needle positioning. If your needle isn’t aligned properly, it can cause skipped stitches. The result? An uneven finish that can be frustrating to fix. Take your time to check your needle's angle. Remember, precision is essential for a clean look.
Lastly, neglecting to test your fabric can lead to miscalculated outcomes. Always use a scrap piece before diving into your main project. Testing helps you adjust your tension and stitch count. It ensures you are on the right track. Mastering nail interlock techniques requires attention to detail. Small mistakes can lead to bigger issues, so reflect on each step.
Tips for Perfecting Your Nail Interlock Skills
Mastering nail interlock techniques requires practice and attention to detail. Start by ensuring your workspace is tidy and well-lit. A clutter-free area helps you focus on the task. Use a simple setup with essential tools only. Remember that less is more in this case.
Pay close attention to your grip. A firm yet gentle hold on the materials will help you maintain control. If your hands feel tense, take a break. Relaxation is key to precise movements. Don’t rush the process. Mistakes happen, and they are excellent learning opportunities. Reflect on each attempt; consider what went wrong.
Experiment with different angles and pressures. Finding what works best for you may take time. Keep a journal to track your progress. Record both successes and challenges. This will help you visualize improvement. Celebrate small victories, but stay humble about areas needing growth.